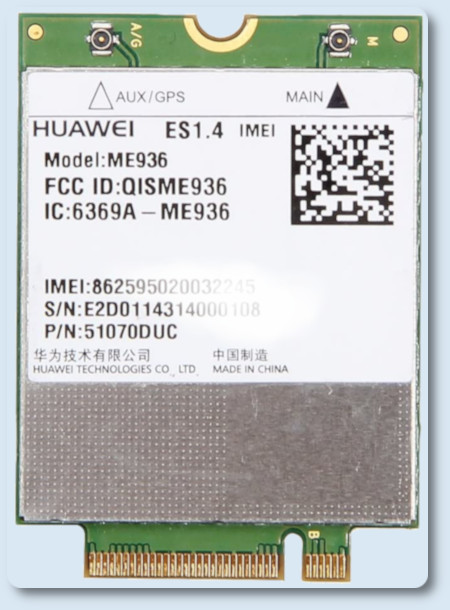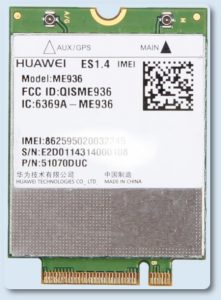
Huawei ME936 modulo LTE Debian 10
Per uno dei miei notebook workstation, Schenker XMG P507, ho comprato un modulo LTE Huawei ME936, che per farlo funzionare, su Debian 10, c’è bisogno di qualche trick. Dopo aver creato una connessione Mobile Broadband, tramite Network-Manager, non si riesce a navigare, e come si può vedere sotto con i due comandi, la scheda viene riconosciuta:
$ lsusb
$ usb-devices
output:
edmond@debianbox:~$ lsusb
Bus 002 Device 001: ID 1d6b:0003 Linux Foundation 3.0 root hub
Bus 001 Device 005: ID 04f2:b5a7 Chicony Electronics Co., Ltd
Bus 001 Device 004: ID 8087:0a2b Intel Corp.
Bus 001 Device 003: ID 1c7a:0603 LighTuning Technology Inc.
Bus 001 Device 002: ID 12d1:15bb Huawei Technologies Co., Ltd. ME936 LTE/HSDPA+ 4G modem
Bus 001 Device 001: ID 1d6b:0002 Linux Foundation 2.0 root hub
edmond@debianbox:~$ usb-devices

T: Bus=01 Lev=00 Prnt=00 Port=00 Cnt=00 Dev#= 1 Spd=480 MxCh=16
D: Ver= 2.00 Cls=09(hub ) Sub=00 Prot=01 MxPS=64 #Cfgs= 1
P: Vendor=1d6b ProdID=0002 Rev=05.10
S: Manufacturer=Linux 5.10.0-0.bpo.4-amd64 xhci-hcd
S: Product=xHCI Host Controller
S: SerialNumber=0000:00:14.0
C: #Ifs= 1 Cfg#= 1 Atr=e0 MxPwr=0mA
I: If#=0x0 Alt= 0 #EPs= 1 Cls=09(hub ) Sub=00 Prot=00 Driver=hub

T: Bus=01 Lev=01 Prnt=01 Port=05 Cnt=01 Dev#= 2 Spd=480 MxCh= 0
D: Ver= 2.00 Cls=ef(misc ) Sub=02 Prot=01 MxPS=64 #Cfgs= 3
P: Vendor=12d1 ProdID=15bb Rev=00.01
S: Manufacturer=Huawei Technologies Co., Ltd.
S: Product=HUAWEI Mobile Broadband Module
C: #Ifs= 3 Cfg#= 3 Atr=a0 MxPwr=500mA
I: If#=0x0 Alt= 0 #EPs= 1 Cls=02(commc) Sub=0e Prot=00 Driver=cdc_mbim
I: If#=0x1 Alt= 1 #EPs= 2 Cls=0a(data ) Sub=00 Prot=02 Driver=cdc_mbim
I: If#=0x2 Alt= 0 #EPs= 2 Cls=ff(vend.) Sub=05 Prot=14 Driver=option

T: Bus=01 Lev=01 Prnt=01 Port=06 Cnt=02 Dev#= 3 Spd=12 MxCh= 0
D: Ver= 1.10 Cls=00(>ifc ) Sub=00 Prot=00 MxPS=64 #Cfgs= 1
P: Vendor=1c7a ProdID=0603 Rev=02.00
S: Manufacturer=EgisTec
S: Product=EgisTec_ES603
C: #Ifs= 1 Cfg#= 1 Atr=a0 MxPwr=100mA
I: If#=0x0 Alt= 0 #EPs= 2 Cls=ff(vend.) Sub=00 Prot=00 Driver=(none)

T: Bus=01 Lev=01 Prnt=01 Port=07 Cnt=03 Dev#= 4 Spd=12 MxCh= 0
D: Ver= 2.00 Cls=e0(wlcon) Sub=01 Prot=01 MxPS=64 #Cfgs= 1
P: Vendor=8087 ProdID=0a2b Rev=00.10
C: #Ifs= 2 Cfg#= 1 Atr=e0 MxPwr=100mA
I: If#=0x0 Alt= 0 #EPs= 3 Cls=e0(wlcon) Sub=01 Prot=01 Driver=btusb
I: If#=0x1 Alt= 0 #EPs= 2 Cls=e0(wlcon) Sub=01 Prot=01 Driver=btusb

T: Bus=01 Lev=01 Prnt=01 Port=08 Cnt=04 Dev#= 5 Spd=480 MxCh= 0
D: Ver= 2.00 Cls=ef(misc ) Sub=02 Prot=01 MxPS=64 #Cfgs= 1
P: Vendor=04f2 ProdID=b5a7 Rev=36.01
S: Manufacturer=SunplusIT Inc
S: Product=Chicony USB 2.0 Camera
C: #Ifs= 2 Cfg#= 1 Atr=80 MxPwr=500mA
I: If#=0x0 Alt= 0 #EPs= 1 Cls=0e(video) Sub=01 Prot=00 Driver=uvcvideo
I: If#=0x1 Alt= 0 #EPs= 0 Cls=0e(video) Sub=02 Prot=00 Driver=uvcvideo

T: Bus=02 Lev=00 Prnt=00 Port=00 Cnt=00 Dev#= 1 Spd=5000 MxCh= 8
D: Ver= 3.00 Cls=09(hub ) Sub=00 Prot=03 MxPS= 9 #Cfgs= 1
P: Vendor=1d6b ProdID=0003 Rev=05.10
S: Manufacturer=Linux 5.10.0-0.bpo.4-amd64 xhci-hcd
S: Product=xHCI Host Controller
S: SerialNumber=0000:00:14.0
C: #Ifs= 1 Cfg#= 1 Atr=e0 MxPwr=0mA
I: If#=0x0 Alt= 0 #EPs= 1 Cls=09(hub ) Sub=00 Prot=00 Driver=hub
edmond@debianbox:~$
La soluzione è quella di creare un file “udev-rule”, dove inserire in maniera specifica i parametri necessari:
$ sudo nano /etc/udev/rules.d/71-huawei-me936conf.rules
ed incollare dentro:
ACTION=="add|change", SUBSYSTEM=="usb", \
ENV{DEVTYPE}=="usb_device", \
ATTR{idVendor}=="12d1", ATTR{idProduct}=="15bb", \
ATTR{bNumConfigurations}=="3",
ATTR{bConfigurationValue}!="3" \
ATTR{bConfigurationValue}="3"
dopo aver riavviato, si potrà utilizzare la connessione LTE.
Huawei ME936 modulo LTE Debian 10
enjoy 😉