Server DHCP su Debian 11


Server DHCP su Debian 11 Bullseye.


Installazione e configurazione di un server dhcp su Debian Bullseye:

$ sudo su
# apt install isc-dhcp-server

settare la scheda di rete da utilzzare, nel mio caso eth0:

# nano /etc/default/isc-dhcp-server
# Defaults for isc-dhcp-server initscript
# sourced by /etc/init.d/isc-dhcp-server
# installed at /etc/default/isc-dhcp-server by the maintainer scripts

#
# This is a POSIX shell fragment
#

# Path to dhcpd's config file (default: /etc/dhcp/dhcpd.conf).
#DHCPD_CONF=/etc/dhcp/dhcpd.conf

# Path to dhcpd's PID file (default: /var/run/dhcpd.pid).
#DHCPD_PID=/var/run/dhcpd.pid

# Additional options to start dhcpd with.
#       Don't use options -cf or -pf here; use DHCPD_CONF/ DHCPD_PID instead
#OPTIONS=""

# On what interfaces should the DHCP server (dhcpd) serve DHCP requests?
#       Separate multiple interfaces with spaces, e.g. "eth0 eth1".
INTERFACES="eth0"

poi modificare il file dhcpd.conf inserendo i parametri della nostra rete, nel mio caso 192.168.100.0/24:

# nano /etc/dhcp/dhcpd.conf
# Sample configuration file for ISC dhcpd for Debian
#
#

# The ddns-updates-style parameter controls whether or not the server will
# attempt to do a DNS update when a lease is confirmed. We default to the
# behavior of the version 2 packages ('none', since DHCP v2 didn't
# have support for DDNS.)
ddns-update-style none;

# option definitions common to all supported networks...
option domain-name "example.org";
option domain-name-servers ns1.example.org, ns2.example.org;
default-lease-time 600;
max-lease-time 7200;

# If this DHCP server is the official DHCP server for the local
# network, the authoritative directive should be uncommented.
#authoritative;

# Use this to send dhcp log messages to a different log file (you also
# have to hack syslog.conf to complete the redirection).
log-facility local7;

# No service will be given on this subnet, but declaring it helps the
# DHCP server to understand the network topology.

#subnet 10.152.187.0 netmask 255.255.255.0 {
#}

# This is a very basic subnet declaration.
subnet 192.168.100.0 netmask 255.255.255.0 {
range 192.168.100.150 192.168.100.160;
option routers 192.168.100.1;
option subnet-mask 255.255.255.0;
option broadcast-address 192.168.100.254;
option domain-name-servers 192.168.100.1, 192.168.100.2;
option ntp-servers 192.168.100.1;
option netbios-name-servers 192.168.100.1;
option netbios-node-type 8;
}
#subnet 10.254.239.0 netmask 255.255.255.224 {
#  range 10.254.239.10 10.254.239.20;
#  option routers rtr-239-0-1.example.org, rtr-239-0-2.example.org;
#}

# This declaration allows BOOTP clients to get dynamic addresses,
# which we don't really recommend.

#subnet 10.254.239.32 netmask 255.255.255.224 {
#  range dynamic-bootp 10.254.239.40 10.254.239.60;
#  option broadcast-address 10.254.239.31;
#  option routers rtr-239-32-1.example.org;
#}

# A slightly different configuration for an internal subnet.
#subnet 10.5.5.0 netmask 255.255.255.224 {
#  range 10.5.5.26 10.5.5.30;
#  option domain-name-servers ns1.internal.example.org;
#  option domain-name "internal.example.org";
#  option routers 10.5.5.1;
#  option broadcast-address 10.5.5.31;
#  default-lease-time 600;
#  max-lease-time 7200;
#}

# Hosts which require special configuration options can be listed in
# host statements.   If no address is specified, the address will be
# allocated dynamically (if possible), but the host-specific information
# will still come from the host declaration.

#host passacaglia {
#  hardware ethernet 0:0:c0:5d:bd:95;
#  filename "vmunix.passacaglia";
#  server-name "toccata.fugue.com";
#}

# Fixed IP addresses can also be specified for hosts.   These addresses
# should not also be listed as being available for dynamic assignment.
# Hosts for which fixed IP addresses have been specified can boot using
# BOOTP or DHCP.   Hosts for which no fixed address is specified can only
# be booted with DHCP, unless there is an address range on the subnet
# to which a BOOTP client is connected which has the dynamic-bootp flag
# set.
#host fantasia {
#  hardware ethernet 08:00:07:26:c0:a5;
#  fixed-address fantasia.fugue.com;
#}

# You can declare a class of clients and then do address allocation
# based on that.   The example below shows a case where all clients
# in a certain class get addresses on the 10.17.224/24 subnet, and all
# other clients get addresses on the 10.0.29/24 subnet.

#class "foo" {
#  match if substring (option vendor-class-identifier, 0, 4) = "SUNW";
#}

#shared-network 224-29 {
#  subnet 10.17.224.0 netmask 255.255.255.0 {
#    option routers rtr-224.example.org;
#  }
#  subnet 10.0.29.0 netmask 255.255.255.0 {
#    option routers rtr-29.example.org;
#  }
#  pool {
#    allow members of "foo";
#    range 10.17.224.10 10.17.224.250;
#  }
#  pool {
#    deny members of "foo";
#    range 10.0.29.10 10.0.29.230;
#  }
#}

dopo le modifiche riavviare il servizio:

# systemctl restart isc-dhcp-server.service
Server DHCP su Debian 11 Bullseye

enjoy ?

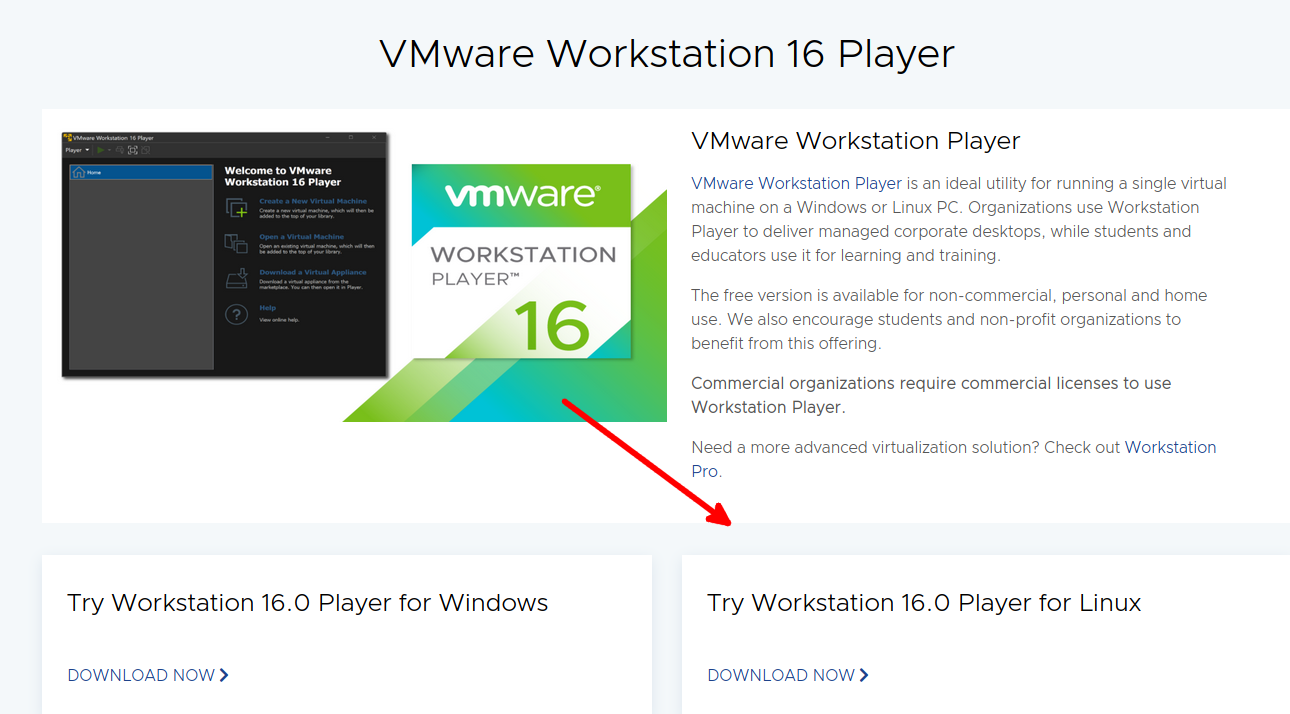
VMware Workstation 16 Player Debian 11

VMware Workstation 16 Player Debian 11


Guida su come installare VMware Workstation 16 Player su Debian 11.

  • Primo step:

Download diretto dal sito ufficiale

  • Secondo:

installazione pacchetti essenziali

sudo apt install build-essential linux-headers-$(uname -r)

Terzo:

installazione

cd Downloads
chmod +x VMware-Player-Full-*.bundle
sudo ./VMware-Player-Full-*.bundle
sudo apt install open-vm-tools-desktop

Quarto:

git clone https://github.com/mkubecek/vmware-host-modules.git
cd vmware-host-modules
git checkout workstation-16.2.3
make
sudo make install

Disinstallazione:

sudo vmware-installer --uninstall-product vmware-player


enjoy 😉


SysLinuxOS for Systems Integrator

SysLinuxOS for System Integrator è una debian stable based, creata da me, che include quasi tutti i tools che possono servire per il lavoro, ed in più altri strumenti fuori dai repository ufficiali, che servono ad avere una distro funzionante subito, ed oltre a poterla installare la si può utilizzare e provare da live.

SysLinuxOS (for Systems Integrator) is an Debian-based GNU/Linux live distribution, created for Systems Integrator and Sysadmins. It offers a complete networking environment that is organised to integrate existing software tools, with others added by me, and has an friendly graphical interface. SysLinuxOS was built to work right out of the box, with all networking tools already installed by default. There is no need to install anything, it is a Swiss army knife to always carry with us. There are all the major VPNs, different remote control clients, different browsers, Wine, Wireshark, Etherape, Ettercap, PackETH, Packetsender, Putty, Nmap, Packet Tracer 8, tools for serial console and much more ….

Based on Debian 11 bullseye

Mate Desktop Environment, and last backports kernel 5.16!

enjoy 😉

FreePBX Trunk Pjsip su FRITZBox

 FreePBX Trunk Pjsip su FRITZ!Box

FreePBX Trunk Pjsip su FRITZ!Box


Guida su come configurare un FreePBX Trunk Pjsip su FRITZBox, per funzionare in parallelo ad un centralino FreePBX/Asterisk. Io ho una connessione dati e voce con Vodafone, ed il mio numero si registra correttamente attraverso il router FRITZ!Box, utilizzando dei dect. I router FRITZ!Box, hanno un centralino incorporato, che in maniera semplice registrano sia i telefoni analogici che i telefoni voip, ma se si volesse  aumentare di molto i telefoni, ed avere un centralino più strutturato, con un IVR per esempio, bisogna affidarsi al centralino Asterisk/FreePBX. Questa guida parte dal presupposto, che il FRITZ!Box ed il server PBX sono gia configurati e funzionanti.

1) Creare interno server FreePBX direttamente sul FRITZ!Box:

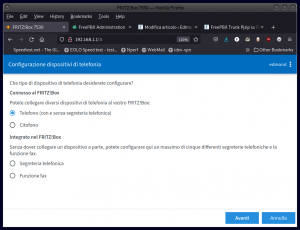
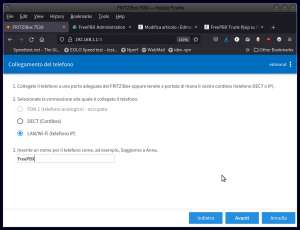
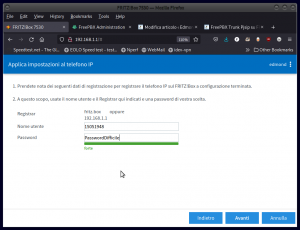
Menù Telefonia > Dispositivi di telefonia > Configurazione nuovo dispositivo, e poi seguire le immagini:

FreePBX Trunk Pjsip su FRITZ!BoxFreePBX Trunk Pjsip su FRITZ!BoxFreePBX Trunk Pjsip su FRITZ!BoxNotare che il nome utente è numerico e queste credenziali andranno inserite successivamente nel Trunk pjsip in FreePBX.


2) Creazione Trunk pjsip in FreePBX

Esempio delle immagini:

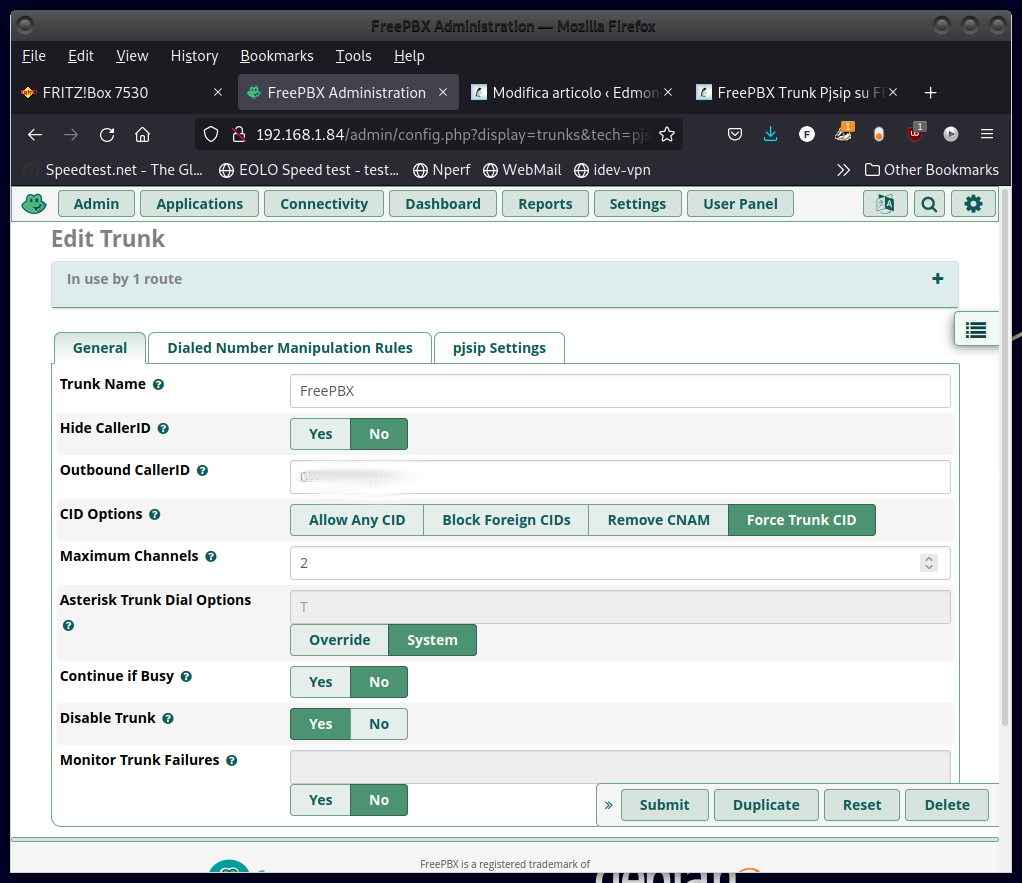
Trunk Name=FreePBX
Outbound caller ID=numero telefonico
CID Options=Force Trunk CID
Maximum Channels=2


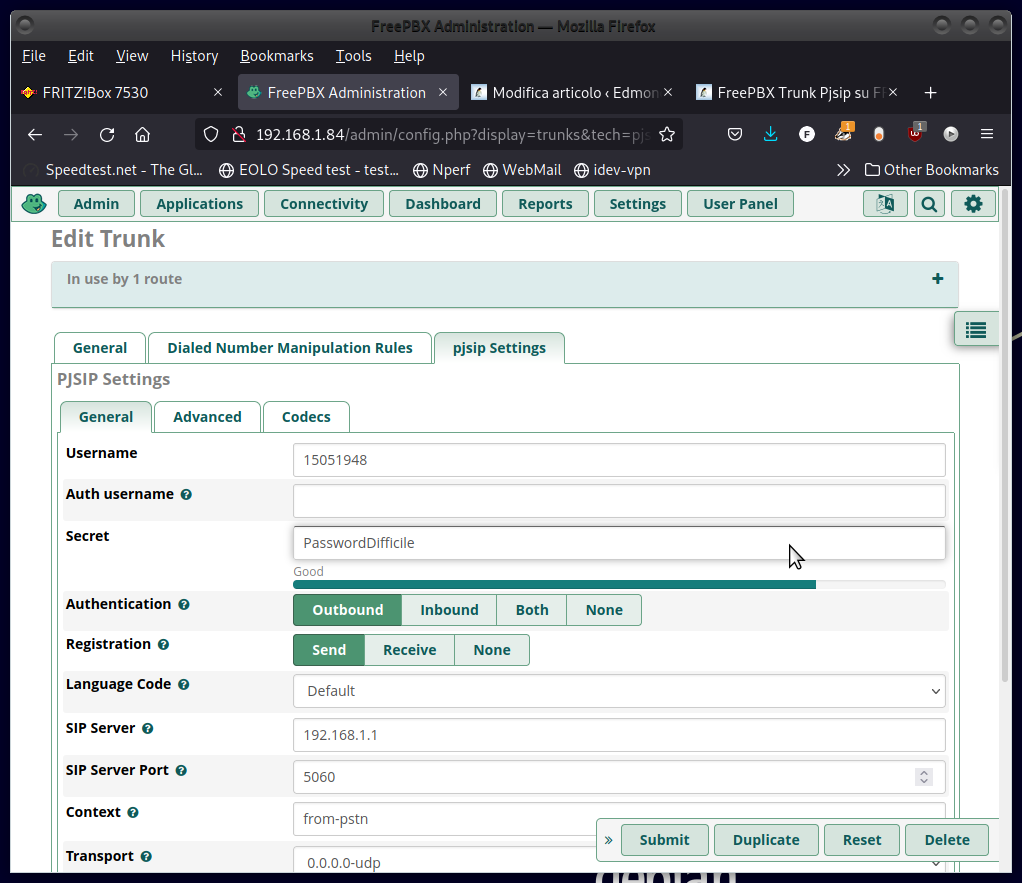
Trunk Pjsip Settings:

username=15051948
password=PasswordDifficile
server=192.168.1.1 (ip FRITZ!Box)
porta=5060 udp


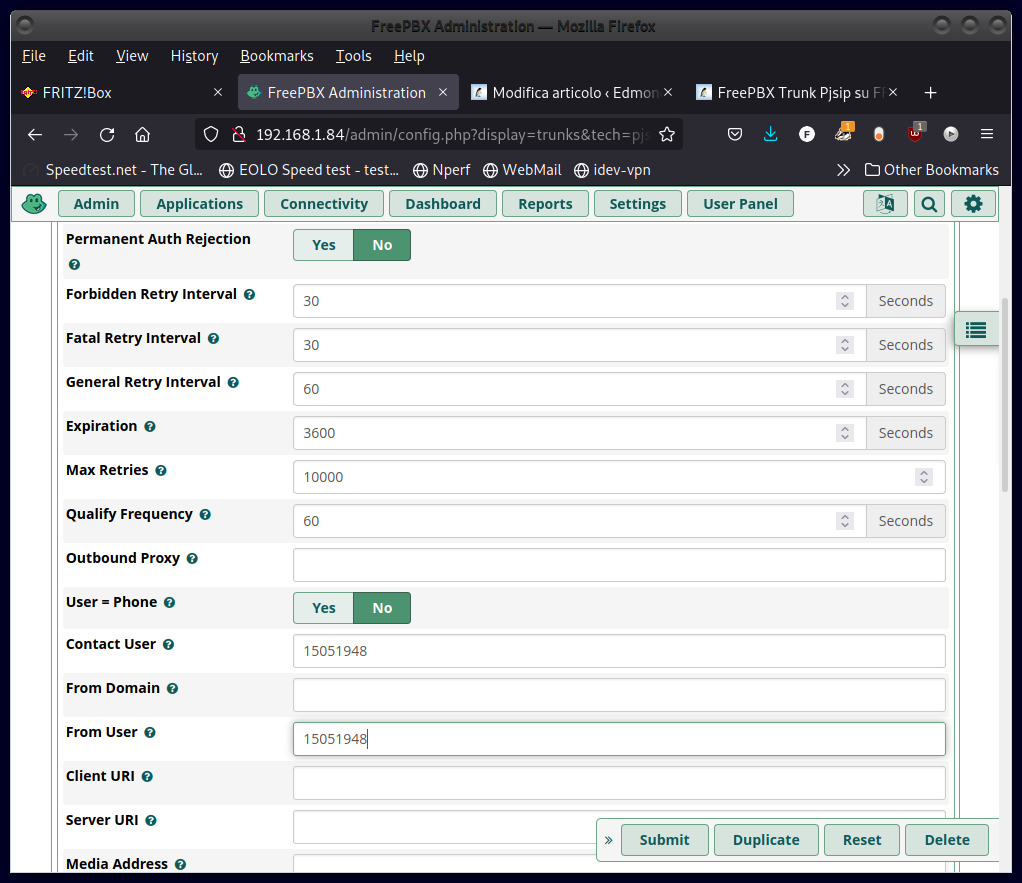
Trunk Pjsip Settings Advanced:

Contact User=15051948
From User=15051948


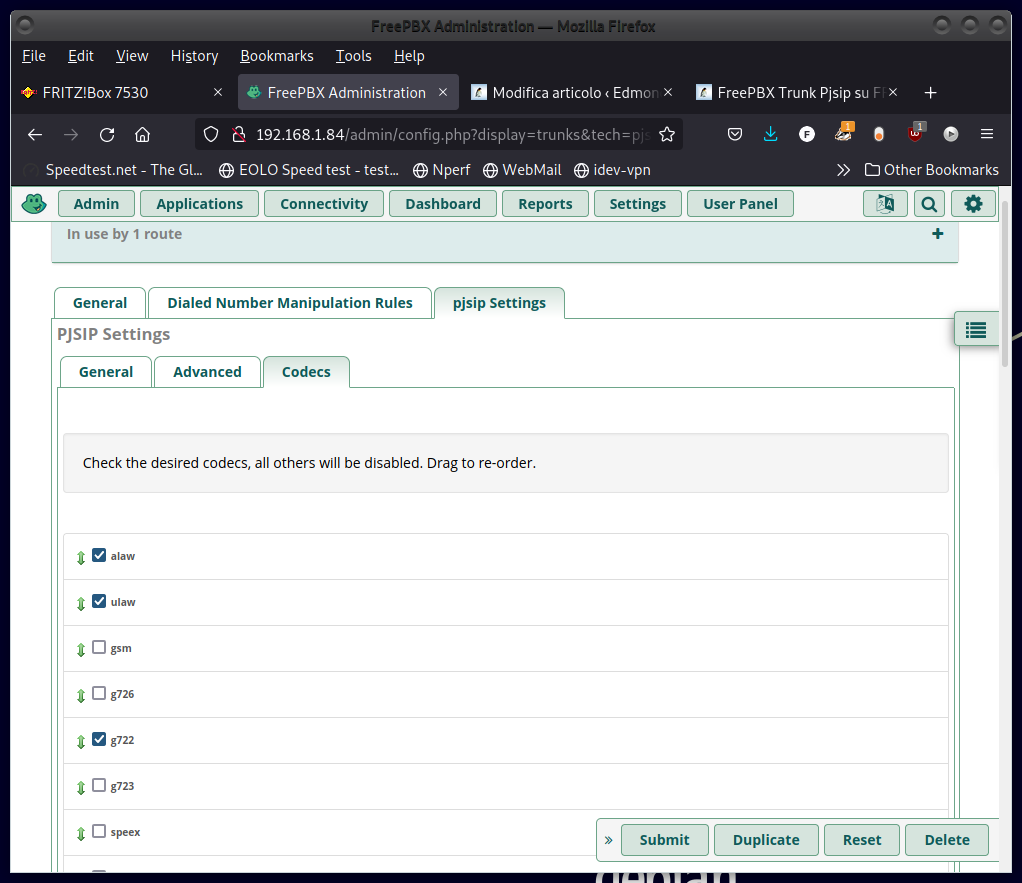
Trunk Codecs:


In conclusione, con questo tipo di configurazione abbiamo integrato il nostro centralino Asterisk/FreePBX, con la robustezza di un router FRITZ!Box.

FreePBX Trunk Pjsip su FRITZ!Box

enjoy 😉


Asterisk 18 FreePBX 16 su Raspberry Pi 4 e Raspberry Pi OS Bullseye


Asterisk 18 FreePBX 16 su Raspberry Pi 4 e Raspberry Pi OS BullseyeAsterisk 18 FreePbx 16 su Raspberry Pi 4 e Raspberry Pi OS Bullseye


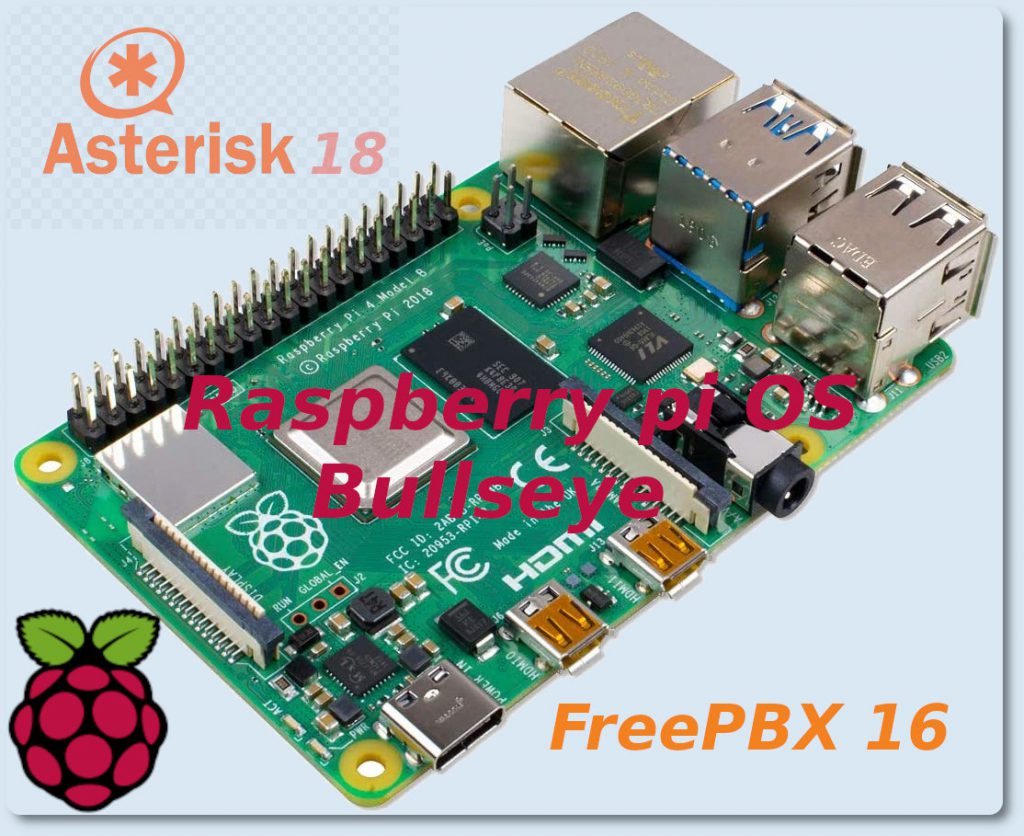
In questa guida aggiornata, scriverò di una installazione su single board Raspberri py 4 con Raspberry Pi OS Bullseye 11, di Asterisk 18 e Freepbx 16. FreePBX 16 funziona bene, e la novità principale è il supporto a php7.4. Esiste anche una versione già pronta, raspbx, ma io preferisco installare tutto da me, poichè il sistema risulta molto più fluido. I passaggi successivi saranno eseguiti come utente root, su una nuova installazione di Raspberry Pi OS Bullseye lite. L’installazione prenderà circa 90 minuti, e prevede che il sistema sia già stato installato e che si abbia un accesso ssh.

1) Aggiornare il sistema

$ sudo su
# apt update
# apt upgrade -y
# reboot
2) Scaricare le dipendenze ed i servizi necessari
# apt install -y wget bison flex php php-pear php-cgi php-common php-curl php-mbstring php-gd php-mysql php-php-gettext php-bcmath php-zip php-xml php-imap php-json php-snmp php-fpm libapache2-mod-php git curl libnewt-dev libssl-dev libncurses5-dev subversion libsqlite3-dev build-essential libedit-dev libjansson-dev libxml2-dev uuid-dev dh-make libssl-dev sox mariadb-client-10.5 mariadb-server-10.5

3) Installare nodejs

# curl -sL https://deb.nodesource.com/setup_18.x | sudo -E bash -
# apt install -y nodejs

4) Reboot server

# reboot

5) Scaricare Asterisk 18 e FreePBX 16

$ sudo su
# cd /usr/src
# wget https://downloads.asterisk.org/pub/telephony/asterisk/asterisk-18-current.tar.gz
# wget https://mirror.freepbx.org/modules/packages/freepbx/freepbx-16.0-latest.tgz

6) Installare Asterisk 18

# tar xvfz asterisk-18-current.tar.gz
# rm -rf asterisk-18-current.tar.gz
# cd asterisk-18.*
# contrib/scripts/get_mp3_source.sh
# ./contrib/scripts/install_prereq install
# ./configure --with-jansson-bundled
# make menuselect


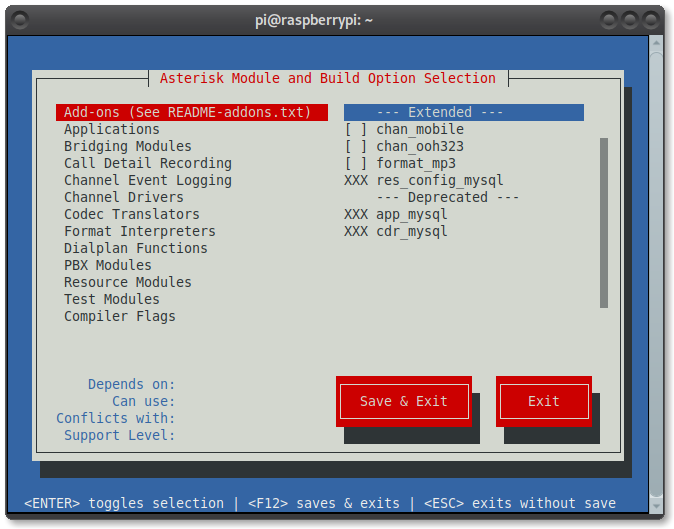
inserire il prefisso internazionale, nel nostro caso 39:

Asterisk 14 Freepbx 14 su Debian Stretch 9.1abilitare format_mp3:

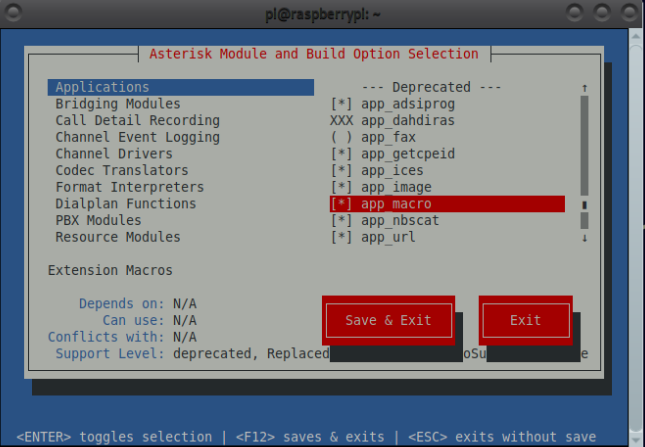
abilitare “macro” in make menuselect > Application > app_macro:

Asterisk 18 FreePBX 16 su Raspberry Pi 4 e Raspberry Pi OS Bullseye

quindi:

# make -j8
# make install
# make samples
# make config

7) Creazione utente Asterisk e permessi

# groupadd asterisk
# useradd -r -d /var/lib/asterisk -g asterisk asterisk
# usermod -aG audio,dialout asterisk
# chown -R asterisk.asterisk /etc/asterisk
# chown -R asterisk.asterisk /var/{lib,log,run,spool}/asterisk
# chown -R asterisk.asterisk /usr/lib/asterisk
# sed -i 's/#AST_USER="asterisk"/AST_USER="asterisk"/g' /etc/default/asterisk
# sed -i 's/#AST_GROUP="asterisk"/AST_GROUP="asterisk"/g' /etc/default/asterisk
# systemctl restart asterisk
# /lib/systemd/systemd-sysv-install enable asterisk

verificare che asterisk funzioni correttamente:

# asterisk -rvvv

8) Configurazione Apache2

# cp /etc/apache2/apache2.conf /etc/apache2/apache2.conf_orig
# sed -i 's/AllowOverride None/AllowOverride All/' /etc/apache2/apache2.conf
# sed -i 's/^\(User\|Group\).*/\1 asterisk/' /etc/apache2/apache2.conf
# mv /var/www/html /var/www/html.bak
# a2enmod rewrite
# systemctl restart apache2

9) Installare FreePBX 16

# cd /usr/src/
# tar xvfz freepbx-16.0-latest.tgz
# rm -rf freepbx-16.0-latest.tgz
# cd freepbx
# ./install -n
# fwconsole chown
# fwconsole ma refreshsignatures
# fwconsole ma installall
# fwconsole reload
# fwconsole restart

In conclusione, se tutto è andato bene il server Asterisk è raggiungibile all’indirizzo http://ip_raspberry. La prima cosa da fare è quella di scegliere nome utente, password e mail, per accedere al pannello di amministrazione. Andare poi nel menu Admin-Module Admin e scaricare ed aggiornare i moduli rimanenti.


enjoy 😉


VirtualBox on Debian 11 Bullseye


VirtualBox on Debian 11 Bullseye


VirtualBox on Debian 11 Bullseye

Attualmente non esistono repository per Debian 11 bullseye per installare VirtualBox, ma solamente quelli per Debian 10. Ma sul sito Oracle esiste una versione “all distributions” che funziona su Debian 11. Si tratta di uno script che installerà VirtualBox 6.1 senza problemi:

Scaricare e salvare lo script, oppure:

$ sudo apt install build-essential linux-headers-amd64
$ wget https://download.virtualbox.org/virtualbox/6.1.22/VirtualBox-6.1.22-144080-Linux_amd64.run
$ chmod +x VirtualBox*
$ sudo ./VirtualBox*

esiste anche VirtualBox Extension Pack 6.1.22.

VirtualBox on Debian 11 Bullseye

enjoy 😉
 

How to compile kernel 5.11 on Debian 11

How to compile kernel 5.11 on Debian 11

How to compile kernel 5.11 on Debian 11

Nei giorni scorsi ho più volte ricompilato il kernel poichè volevo risolvere il problema del lettore “Alcor Micro AU6625”, che su un notebook HP Pavillion 15-dk000nl, non viene riconosciuto, sia su Debian che su tutte le altre distro. Da quello che ho visto e letto, fin dal kernel 5.6, è stato inserito questo driver, ma per quanto mi riguarda non sembra funzionare. Io stesso ho fatto dei cambiamenti, ma senza nessun risultato al momento. Ad ogni modo questa è una altra storia.

Il kernel si può compilare direttamente, come moduli, oppure attraverso la creazione di un pacchetto in formato .deb, installabile.

Prerequisiti:

$ sudo apt-get install build-essential libncurses-dev bison flex libssl-dev libelf-dev dwarves bc rsync wget

Metodo 1

Scaricare il kernel direttamente dalla pagina ufficiale, oppure con wget:

$ mkdir kernel; cd kernel
$ wget https://cdn.kernel.org/pub/linux/kernel/v5.x/linux-5.11.18.tar.xz
$ tar -xvf linux*
$ cd linux-5.11.18/

a questo punto utilizzare, “localmodconfig“, per un kernel minimale/leggero, che provvederà a caricare ed utilizzare solo i driver strettamente necessari per il funzionamento del computer, oppure “menuconfig“, per abilitare nuove funzionalità.

$ make localmodconfig
$ make -j $(nproc)
$ make -j $(nproc) modules
$ sudo make modules_install

il processo prenderà un pò di tempo, tutto dipende dalla potenza dei processori, il mio è un 12 core, quindi ha fatto relativamente presto. Per utilizzare al massimo i processori ho utilizzato “make -j $(nproc)“, che sfrutta tutti i processori esistenti. In fine riavviare.

Metodo 2

$ mkdir kernel; cd kernel
$ wget https://cdn.kernel.org/pub/linux/kernel/v5.x/linux-5.11.18.tar.xz
$ tar -xvf linux*
$ cd linux-5.11.18/

per non avere l’errore seguente:

make[4]: *** No rule to make target 'debian/certs/test-signing-certs.pem', needed by 'certs/x509_certificate_list'.  Stop.
make[4]: *** Waiting for unfinished jobs...

modificare CONFIG_SYSTEM_TRUSTED_KEYS utilizzando sed:

$ sed -ri '/CONFIG_SYSTEM_TRUSTED_KEYS/s/=.+/=""/g' .config

costruzione linux-image e linux-headers:

$ make localmodconfig
$ time nice make -j`nproc` bindeb-pkg
$ cd ..
$ sudo dpkg -i linux-image-* linux-headers-*

How to compile kernel 5.11 on Debian 11

enjoy 😉


Come ascoltare la musica nel telefono tramite le casse del pc Debian Gnu Linux


Guida su come ascoltare la musica presente nel telefono, tramite bluetooth, direttamente da un pc/notebook. Con i nuovi dispositivi cellulari, e le ottime proposte di musica, dei vari Itunes, Musica, Spotify, Amazon Music,  ecc ecc, ci si trova ad avere tutta la musica a disposizione sul cellulare e non sul pc, fermo restando che la si potrebbe ascoltare direttamente dal web. Questo trucchetto è molto utile per ascoltare ad un volume più alto la musica, tutto questo sfruttando le casse più potenti del pc. Gli unici requisiti sono: il bluetooth, ed una installazione di un OS Linux, nel mio caso Debian 10, e molto probabilmente tutto funzionerà out of the box. Nel caso non fossero presenti, installare i pacchetti necessari:

sudo apt install bluez
sudo apt install pulseaudio pulseaudio-utils pavucontrol pulseaudio-module-bluetooth

Io utilizzo Mate come desktop environment, come si vede nel video, quindi i passi successivi saranno:

  1. Avviare il bluetooth
  2. Lanciare Bluetooth Manager
  3. Scansione e pairing tramite codice col cellulare
  4. Avviare la musica sul cellulare
Come ascoltare la musica nel telefono tramite le casse del pc Debian Gnu LinuxCome ascoltare la musica nel telefono tramite le casse del pc Debian Gnu Linux


enjoy 😉


AnyDesk su Debian 11

AnyDesk su Debian 11AnyDesk su Debian 11

Guida su come installare AnyDesk, su Debian 10 e Debian 11. AnyDesk è un alternativa a Teamviewer, ed è uno strumento veloce ed affidabile per il controllo remoto. Su Debian 10 Buster e Debian 11 Bullseye, può essere installato via repository:

Installazione:

$ sudo su
# apt install wget
# wget -qO - https://keys.anydesk.com/repos/DEB-GPG-KEY | apt-key add -
# echo "deb http://deb.anydesk.com/ all main" > /etc/apt/sources.list.d/anydesk-stable.list
# apt update
# apt install anydesk -y

AnyDesk su Debian 11

enjoy 😉


How to enable Wireshark like user

Wireshark should non-superusers be able to capture packets
How to enable Wireshark like user

Nel momento in cui si installa wireshark, viene mostrato la possibilità di scegliere, tra l’utilizzo come normale utente , oppure come consigliato, da root. Purtroppo la scelta di avviare wireshark come semplice user, non funziona, almeno in Debian 10/11, per un problema di permessi “Wireshark should non-superusers be able to capture packets”.

Soluzione:

sudo usermod -a -G wireshark $USER
sudo chgrp wireshark /usr/bin/dumpcap
sudo chmod 755 /usr/bin/dumpcap
sudo setcap cap_net_raw,cap_net_admin=eip /usr/bin/dumpcap

enjy 😉