
Guida su come Installare Asterisk 13 e Freepbx 13 su Debian 8.3 Jessie e Debian 9 Stretch. Questa guida è stata testata da me su entrambe le versioni di Debian e funziona. Tutta la guida è stata fatta come utente ROOT.
Aggiornare il sistema:
# apt-get update && apt-get upgrade
se viene installato un nuovo kernel riavviare.
Scaricare le dipendenze ed i servizi necessari:
# apt-get install -y build-essential linux-headers-`uname -r` openssh-server apache2 mysql-server mysql-client bison flex php5 php5-curl php5-cli php5-mysql php-pear php5-gd curl sox libncurses5-dev libssl-dev libmysqlclient-dev mpg123 libxml2-dev libnewt-dev sqlite3 libsqlite3-dev pkg-config automake libtool autoconf git subversion unixodbc-dev uuid uuid-dev libasound2-dev libogg-dev libvorbis-dev libcurl4-openssl-dev libical-dev libneon27-dev libsrtp0-dev libspandsp-dev libiksemel-dev libiksemel-utils libiksemel3 libjansson-dev libapache2-mod-php5 libmyodbc
a metà installazione verrà chiesto per tre volte di settare una password per Mysql, LASCIARE IL CAMPO VUOTO. La password verrà generata in maniera automatica e sicura.
Scaricare l’occorrente: Pjproject, Jansson, Asterisk, Freepbx:
# cd /usr/src
# wget https://downloads.asterisk.org/pub/telephony/asterisk/asterisk-13-current.tar.gz
# wget -O jansson.tar.gz https://github.com/akheron/jansson/archive/v2.7.tar.gz
# wget https://www.pjsip.org/release/2.4.5/pjproject-2.4.5.tar.bz2
# wget https://mirror.freepbx.org/modules/packages/freepbx/freepbx-13.0-latest.tgz
Installare Pjproject:
# cd /usr/src
# tar -xjvf pjproject-2.4.5.tar.bz2
# cd pjproject-2.4.5
# CFLAGS='-DPJ_HAS_IPV6=1' ./configure --enable-shared --disable-sound --disable-resample --disable-video --disable-opencore-amr
# make dep
# make -j4
# make install
Installare Jansson:
# cd /usr/src
# tar vxfz jansson.tar.gz
# cd jansson-*
# autoreconf -i
# ./configure
# make -j4
# make install
Installare Asterisk 13:
# cd /usr/src
# tar xvfz asterisk-13-current.tar.gz
# cd asterisk-13.*
# contrib/scripts/get_mp3_source.sh
# ./contrib/scripts/install_prereq install
# ./configure
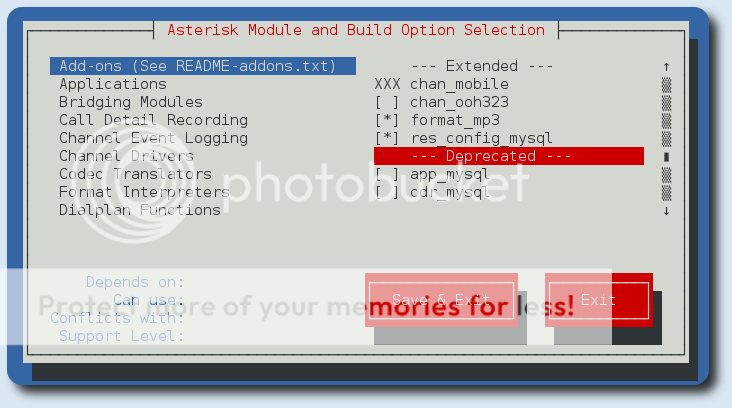
# make menuselect
a questo punto conviene dare un occhiata ed abilitare qualche modulo in più, come format_mp3:
# make -j4
# make install
# make config
# ldconfig
Installazione e configurazione di Mysql ed Apache2:
# pear install Console_Getopt
# useradd -m asterisk
# chown asterisk. /var/run/asterisk
# chown -R asterisk. /etc/asterisk
# chown -R asterisk. /var/{lib,log,spool}/asterisk
# chown -R asterisk. /usr/lib/asterisk
# rm -rf /var/www/html
# cp /etc/apache2/apache2.conf /etc/apache2/apache2.conf_orig
# sed -i 's/\(^upload_max_filesize = \).*/\120M/' /etc/php5/apache2/php.ini
# sed -i 's/AllowOverride None/AllowOverride All/'  /etc/apache2/apache2.conf
# sed -i 's/^\(User\|Group\).*/\1 asterisk/' /etc/apache2/apache2.conf
# a2enmod rewrite
# service apache2 restart
# nano /etc/odbcinst.ini
ed incollare dentro:
[MySQL]
Description = ODBC for MySQL
Driver = /usr/lib/x86_64-linux-gnu/odbc/libmyodbc.so
Setup = /usr/lib/x86_64-linux-gnu/odbc/libodbcmyS.so
FileUsage = 1
il percorso dei driver potrebbe essere diverso se non si è su una macchina x86_x64, per verificare il percorso:
# find / -name libmyodbc.so
poi ancora:
# nano /etc/odbc.ini
ed incollare dentro:
[MySQL-asteriskcdrdb]
Description=MySQL connection to 'asteriskcdrdb' database
driver=MySQL
server=localhost
database=asteriskcdrdb
Port=3306
Socket=/var/run/mysqld/mysqld.sock
option=3
Installazione di Freepbx 13:
# cd /usr/src
# tar vxfz freepbx-13.0-latest.tgz
# cd freepbx
# ./start_asterisk start
# ./install -n
se tutto è andato bene il server Asterisk è raggiungibile all’indirizzo https://ip_raspberry.
- La prima cosa da fare è quella di scegliere nome utente, password e mail, per accedere al pannello di amministrazione.
- Andare nel menu Admin-Module Admin e scaricare ed aggiornare tutti i moduli
- Andare in Settings-Advanced Settings-Device Settings ed impostare Sip Nat=yes. Poi andare nella sezione Dialplan and Operational ed impostare SIP Channel Driver=both
Errori:
Error!
Reload failed because retrieve_conf encountered an error: 1
click here for more info
1 error(s) occurred, you should view the notification log on the dashboard or main screen to check for more details.
Questo tipo di errore impedisce di salvare le modifiche, io ho risolto con:
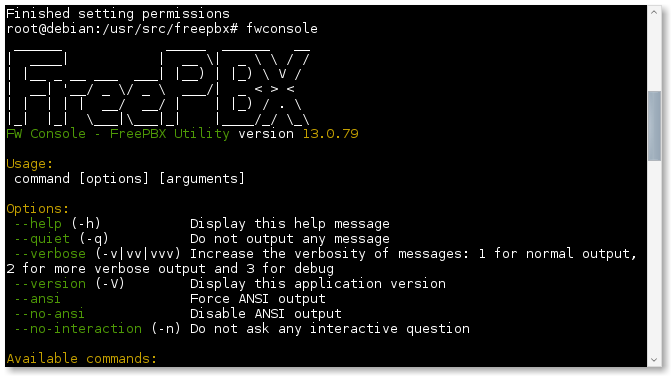
# cd /usr/src/freepbx
# fwconsole chown
# fwconsole restart
e poi andare a salvare di nuovo le modifiche fatte, direttamente dalla pagina web, ed il tutto dovrebbe funzionare. Adesso si è pronti ad utilizzare Asterisk 13 Freepbx 13 su Debian 8.3 e Debian 9 Stretch.
enjoy 😉


Hi, i am getting the following errors:
root@Vpbx: /usr/src/freepbx $ ./start_asterisk start
STARTING ASTERISK
Asterisk Started
root@Vpbx: /usr/src/freepbx $ ./install -n
Assuming you are Database Root
Checking if SELinux is enabled…Its not (good)!
No /etc/asterisk/asterisk.conf file detected. Installing…Writing /etc/asterisk/asterisk.conf…Done
Checking if Asterisk is running and we can talk to it as the 'asterisk' user…Error!
Error communicating with Asterisk. Ensure that Asterisk is properly installed and running as the asterisk user
Asterisk appears to be running as asterisk
Try starting Asterisk with the './start_asterisk start' command in this directory
root@Vpbx: /usr/src/freepbx $ fwconsole chown
-bash: fwconsole: command not found
root@Vpbx: /usr/src/freepbx $
fwconsole chown and fwconsole restart must be launched with Root privileges.
hi.the only user in the system is root.
I do not think you're using Debian. however this error " fwconsole: command not found " means that you do not have root privileges. Instead " Error communicating with Asterisk. Ensure that Asterisk is properly installed and running as the asterisk user " means Asterisk is not working. Try removing everything and try again.
Hi Franco,
Great article. Did you try to install asterisk from packages?
According to this page
https://tracker.debian.org/pkg/asterisk
it is missing for 4 month already.
Do you know something about the current state of asterisk in debian testing?
Cheers,
Igor
Hi Igor
I know nothing about Asterisk on Debian Testing, because I’ve always preferred to compile Asterisk. I do not know why but I never installed from the repository 🙂
hi.. i am using debian 8 and i am following your steps.
"apt install sudo" fixed for me
Ciao,
potrebbe tornare utile aggiungere i repository di jessie per potere installare php5.
Io ho avuto problemi con usa fresh install di Debian 9. Ricevevo
E: Package 'php5' has no installation candidate
Ho aggiunto i repository come da link sotto:
https://leninmhs.wordpress.com/2017/04/03/instalar-php5-en-debian-9-stretch/
et voila.
Spero di essere utilte a qualcuno.
Massimo
in effetti è così…grazie 😉
Se su debian 9 doveste incappare in questo errore:
Assuming you are Database Root
Checking if SELinux is enabled…Its not (good)!
Reading /etc/asterisk/asterisk.conf…Done
Checking if Asterisk is running and we can talk to it as the 'asterisk' user…Error!
Error communicating with Asterisk. Ensure that Asterisk is properly installed and running as the asterisk user
Asterisk appears to be running as asterisk
Try starting Asterisk with the './start_asterisk start' command in this directory
dopo avere lanciato lo script ./install -n
potete risolvere installando sudo che di default non è installato
apt-get install sudo
Spero di essere stato utile.
Max
ogni commento è il benvenuto 😉